How to Connect Canon Printer to Laptop Wirelessly: Full Guide
Are you in search of how to connect Canon printer to laptop wirelessly? Dive into this blog and learn to connect a Canon printer to any laptop using a Wi-Fi network. Ever since I left my job as a customer support representative from a prestigious printer company, I have started my own venture, where I still offer support to many printer users. Resolving printer-related issues or helping customers set up their new printers is my forte.
Using my skills, I want
to help you all with the Canon printer setup. In this guide, we will discuss
easy instructions on how to connect
Canon wireless printer. Let’s get started without any further ado!
How to Connect
Canon Printer to Laptop Wirelessly?
Wireless connection is
one of my favorite ways of doing things, as I have nothing to do with those
clumsy wires. Really, long wires and organizing them in a proper order is often
annoying. So, I prefer to connect my printer to my device wirelessly.
Here is how you can
connect your printer to your laptop using Wi-Fi:
Step
1: Turn on the Printer
In the first step, turn
on the printer. Plug in all the power cables and press the power button located on the top of the printer.

Step
2: Navigate to Printer’s Settings
After that, you will
need to look for the printer’s Settings.
You can discover this option on your printer’s control panel.
Step
3: Go to Device Settings
Once you are in your
printer’s settings, you have to press the arrow button again and navigate to Device Settings. Then, press the OK button.
Step
4: Move to LAN Settings
Next, you will need to
head to the LAN Settings using the
arrow key. After that, click the OK
button. Again, run to the Wireless LAN
setup using the same navigation button and press the OK button.
Once you’ve done this,
your printer will look for an available Wi-Fi network. Meanwhile, a light will
flash. Note: If your printer is
taking too long to search for an available Wi-Fi network, please follow the
instructions below.
Here is how to connect Canon printer to laptop
wirelessly:
Step
1: Press the Stop Button
First of all, you have
to hit the Stop button on your Canon
printing device.
Step
2: Navigate to Wireless LAN Setup
Then, it will take you
to Wireless LAN setup, the standard
setup. Here, you have to click on OK
to proceed ahead.
Step
3: Go to the Wi-Fi Network
Afterward, proceed with
the Wi-Fi network option and press OK to
confirm.
Step
4: Enter Your Wi-Fi Password
Next, input the Wi-Fi Password and then OK. Finally, you will have to click on
the OK button once you notice the
text: Connected.
By the above-mentioned
steps, you might have understood how to
connect Canon printer to laptop wirelessly. With these simple steps, anyone
can connect their printer to the Wi-Fi network.
Add Canon
Printer to Your Windows Computer
When the Canon printer
is connected to your laptop wirelessly, you will need to add it to your laptop.
Adding a printer to a PC is a breeze. You can do this in two simple steps, as
mentioned below. Let’s take a look:
Step
1: Launch the Run Command
First, you need to open
the Run command. To open a run command, type the Windows + R keys on your keyboard.
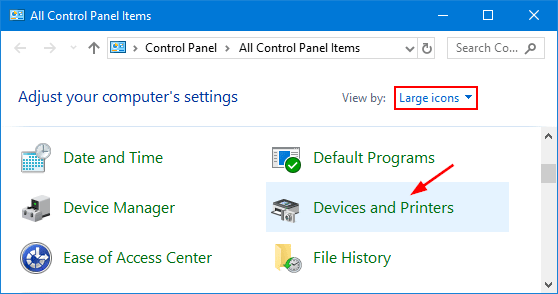
On it, you need to copy: control /name Microsoft.DevicesAndPrinters and paste it on the run command box. After pasting it, you will have to select the OK button.
Step
2: Navigate to Devices and Printers
As a result, you will be
moved to Devices and Printers.
Next, you have to hit on
the Add a printer option.
Now, walk through the instructions shown on the screen to add the printer to your Windows PC. Finally, your steps will be done, and you will be able to add your Canon printer to your laptop hassle-free.
Finally, I have
described how to connect Canon printer
to laptop wirelessly in simple steps. Connect your printer to your laptop
and print, fax, and scan anything hassle-free.
FAQs
Question
1: How to setup a Canon printer?
Answer: In order to setup a printer, follow
the steps below:
- First of all, you have to prepare the printer.
- To prepare the printer, you need to place it on a flat table.
- After that, you will need to install the printer driver.
- To download the driver, you can use a CD-ROM and the official
site.
- Next, connect the printer wirelessly and add
it to your device.
Question
2: How to activate my Canon printer?
Answer: Activating a printer is not a daunting
task. With simple tutorials or steps, you can easily do this in no time. Follow
the steps that I have described below to connect your printer:
- First, hit the notification area icon after installation.
- Then, you have to go to Settings
> Printing > Canon Print Service.
- Next, you have to activate the service on
the Settings screen.
Question
3: How to get my Canon printer to work on my PC?
Answer: To get your Canon printer to work on
your Windows PC, you can simply connect it to your computer. You can insert a
USB cord to form a stable connection to your printer. This is a traditional
method of connecting printers, but it is still worth trying. All you need to do
is connect one end of your printer to the printer and another end to the
computer. And then you are ready to go.
Read more: ij.start.canon


Comments
Post a Comment